


I used my standard 1500pts Dark Angels list throughout the tourni (which can be found here). The rest of the armies were dominated by marines, with Chaos Marines being the most numerous. There were also a few Inquisition forces, and 1 Tau, 1 Daemon, 1 Eldar and Dark Eldar army. I would complain about the lack of variety, but then again I had brought marines myself...
All the games we played were pre-determined and had a varying number of tourni points available dependant on how good/bad your victory/loss was. Extra tourni points (to a max of 30pts per game) could be scored for the following:
1. More Victory Points scored than opponent
2. Killing most expensive enemy HQ
3. Most expensive enemy unit/vehicle under half strength/destroyed
4. 1 Undamaged vehicle or squad above half strength within 12'' of enemy board edge
Game 1 - Space Marines (Dark Angels - Walter)
Seize Ground (5 Objectives) - Dawn of War
Having had to leave Bristol at 5am to get to Liverpool in time, I was already feeling tired as I arrived for the first game. Luckily my opponent, Walter, was an absolute gem of a guy who was also at his first tournament. Amusingly, he was also a Dark Angels player, however, he had the effrontery to be using the vanilla Marine Codex. Now, I couldn't blame the guy, but I figured I should attempt to show him the error of his ways!
His List
Captain - Relic Blade, Storm Bolter
Command Squad - Power Fist, Apoc.
Razorback - Twin Lascannons
Tac. Squad - Power Fist, Meltagun, Plasma Cannon
Rhino
Tac. Squad - Power Fist, Meltagun, Plasma Cannon
Rhino
Tac. Squad - Power Fist, Meltagun, Lascannon
Rhino
6 Man Assault Squad - Flamer
Vindicator
Whirlwind
Deployment
Winning the roll for first turn, I relinquished the initiative to Walter - hoping to have that last turn to grab objectives, and to see where his considerable firepower would be placed. Being DoW, deployment was limited. He placed down two tac squads, one on each side of the board to threaten objectives.
I split my tac squad up and placed the Lascannon in cover behind a hill in the center of my deployment zone, a move and a run away from an objective. I then placed the Plasma Gun Combat Squad in cover on the eastern flank, near another objective. I knew that Walter could easily win the day by destroying my few troop choices, so I was keen to keep them hunkered down until nearer turn 5.
Turn 1
Walter moved his mass of armour on the field, concentrating on the west side of the board, whilst the arrival of two tactical squads in the east more than outnumbered my one tactical squad guarding objectives.

Fearful of the power of his Vindicator and Lascannon Razorback, my Land Raider (carrying Belial and the Terminator Command Squad) and Land Speeder snuck onto the board on the west flank, using a tower as cover. Given that both the D'wing and Ravenwing bikers were in reserve, I wanted to wait a least a turn before striking.
Conor: 0 Objectives Walter: 0 Objectives
Turn 2
In his turn Walter continued to advance his armoured wall, and was frustrated to find he had little to shoot at. What shots he could aim at my tac. marines were deflected by either power armour or cover.
In my turn, in an usually punctual display, all my reserves turned up. To add the icing on the cake, all the Ravenwing managed to outflank to the west, exactly where I needed them. Realising I had to pounce pretty much now or never, I was still concerned about the Vindicator and two Plasma Cannons making a mess of my troops - especially Belial's squad. In order to provide my advance round the building with some cover, I set the Ravenwing bikers against the assault marines. I knew they wouldn't beat the squad in combat, but it would keep the bikers safe from shooting and provide a LoS blocking combat. I was also confident that Belial would be able to charge in next turn to save them, and ready to carve through the rest of the enemy army.
My second D'Wing squad tryed to deep strike behind cover, ready to move onto an objective in the central ruins, but scattered, right into the firing line of the Vindicator. Doh! I was forced to run them, hoping that I would be lucky when the templates came.
After some ineffective shooting, the Ravenwing charged the Assault Marines, killing two for a loss of two themselves. Belial and his squad emerged from the Land Raider and charged to nearest Rhino, immobilising it, and using it as handy cover!

Conor: 0 Objectives Walter: 0 Objectives
Turn 3
Walter was again frustrated by a less than perfect round of shooting. His Vindi scattered badly, only killing two terminators in the central squad, whilst the Plasma and Lascannon fire he poured into Belial's unit was completely blunted by those 4+ cover saves. However, despite this, his numbers were beginning to tell, as he took two objectives in his own deployment zone with separate Combat Squads. Meanwhile the two Rhinos (containing a Combat Squad each) on the west flank pushed towards the centre - bearing down on my Lascannon squad and the nearby 5th objective. He also dismounted another combat squad from the immobilised Rhino, but their shooting at Belial's squad was ineffective. In the combat phase the Terminator Command Squad wrecked the same Rhino.
It was clear at this point that I needed to quickly finish off with the western flank, in order to help my Combat Squads in the east that were about to be overwhelmed. To this end, the Terminator Command Squad advanced on the Assault Marine/Ravenwing Combat, whilst Belial detached himself, confident of his ability to deal with the nearest combat squad alone. Near the ruins, the second Terminator Squad advanced on the Razorback & Vindicator, supported by the Ravenwing and the Attack Bike.
Shooting was mixed, the Attack Bike and Land Speeder managed to immobilise and stun the Vindicator, whilst the Crusader began to whittle down a Plasma Cannon Combat Squad in Walter's deployment zone. Annoyingly though, the Lascannon in my Combat Squad managed to miss the Rhino's bearing down on it. Combat was much more fruitful, with dual Terminator charges - always fun! The attack on Razorback left it immobilised and with no Lascannons, and the Termi Command Squad made short work of the Assault Squad. Belial, charging through cover, was able to kill all 5 marines in the combat squad, but was taken down by the dying Sergeants power fist.

Conor: 0 Objectives Walter: 2 Objectives
Turn 4
With the west flank beginning to crumble, Walter pushed on in the center where he would easily be able to win on objectives. One Rhino peeled off, its squad disembarking in the ruins and claiming an objective, whilst the second bore on into my deployment zone, claiming the objective opposite my Lascannon team. In his shooting phase Walter was a bit limited by the fact that I had consolidated my Ravenwing to screen the Deathwing Command Squad, giving them a cover save against his Plasma Cannons. Failing to kill any Deathwing, he instead gunned down both the Land Speeder and two Ravenwing Bikers, leaving one left. In combat his Command Squad charged the Terminator Squad that had wrecked the Razorback, the Captain's Relic Blade easily taking care of the three remaining Deathwing. Ouch!
In my turn, conscious that I really needed to start moving on objectives, my Deathwing ignored the temptation to charge the Command Squad, and instead advanced towards the Plasma Cannon Combat Squad. The plan was to cut them down this squad this turn, setting me up to advance on another Combat Squad holding an objective behind the hills. In the east, my Lascannon team moved around their cover, and made ready to try and shift the enemy off their objective. In my shooting phase the remaining Ravenwing shot into the approaching Command Squad to no effect, the Crusader failed to kill any of the Combat Squad holding the ruin and finally the Lascannon team managed to kill one of their opponents with pistols. The Attack Bike did manage to blow the Whirlwind sky high, which was a bonus!
Combat again went well, the Terminators easily killing all of the 5 marines they faced, and the Lascannon team managing to kill two marines on their objective. Best of all the Sergeant with the Power Fist didn't manage to hit the lascannon team, though he held fast with the last member of his squad.
Conor: 1 Objective Walter: 4 Objectives
Turn 5
With 4 of his 5 Combat Squads either holding or contesting objectives, Walter's movement was limited to his Command Squad chasing after my Terminators. With that Captain and his Relic Blade backed up by Veteran with a Power Fist, the squad was more than capable with dealing with my Terminators, who really were my only hope at this point.
In his shooting phase the Command Squad attempted to down some of my Terminators to no avail, whilst a Combat Squad gunned down the attack bike. In combat his Power Fist armed Sergeant once again failed to hit my marines and watched while his last comrade was dragged under. The crucial Command Squad charge started well for Walter, with the Captain felling two Terminators. However, in return the Deathwing cut down most of his Command Squad and won the combat. Determined to safeguard his objectives however, the Captain and his remnants stood fast.
Movement in my turn was pretty limited. The Land Raider swung round (running over the wrecked Rhino) to continue firing on the Combat Squad in the ruins, and my one remaining Ravenwing biker turbo-boosted to that objective, hoping to deny it to the enemy should this be the last turn.

After an uneventful shooting phase, the combat phase began. In the east my Lascannon team failed to down the remaining Sergeant, who again only managed to flail wildly with his Power Fist, leaving the objective contested. In the crucial combat with the Terminators, the Captain was only able to kill one Terminator (I made three 5+ saves against the Relic Blade!), and he was swiftly cut down - leaving only one Marine standing bravely in the Deathwing's path. Did I say bravely? I meant incredibly foolishly...

We rolled for the end of the game and the Emperor smiled on the true Dark Angel forces, granting me a turn 6.
Conor: 1 Objective Walter: 2 Objectives
Turn 6
Again Walter was pretty much limited in what he could do. As the Terminator squad was in combat he was unable to fire on them with the nearby Combat Squad, but equally could not move away as he would loose that objective. He was able to destroy the last Ravenwing biker, and regained control of the ruin objective. Finally he moved a Rhino in the east to contest the one objective I actually held at that point.
Combat saw him loose both this Power Fist Sergeant in the east (leaving me in control of that objective!) and the last of the Command Squad. At the end of Walters 6th turn he was 3-1 up - it would be down to the D'wing once again.

My first move in my turn was charge my Land Raider forward, successfully negotiating difficult terrain, to contest the ruin objective. The Melta-Gun armed combat squad there would give me no end of pain if there was a turn 7, but Walter was so far ahead that I had to even the Balance. Annoyingly, both the Lascannon and the Plasma Gun of the Tactical Squad failed to blow up the Rhino contesting the objective furthest east. In combat, the remaining Deathwing advanced and did their job excellently, with the enraged Apothecary killing with all his attacks, wiping out the Combat Squad and taking the objective they were standing on.

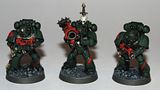
(In this picture, the Land Raider is actually on the terrain and contesting the objective, it was just impossible to actually place it there!)
Conor: 2 Objectives Walter: 1 Objective
With the balance temporarily switched in my favour, we rolled for the end of the game. The dice came up a 2, leading to:
Dark Angels Victory!

... victory for my Dark Angels that is!
So, a really enjoyable game where I was able to pull a victory from the jaws of defeat. Walter was an excellent opponent who provided a good explanation for his defeat. He pointed out that he got greedy and attempted to go for all the objectives when the battle was going well. After he had spreaded out to do this, I was able to take his army down piece by piece.
So, with points for a narrow victory, more VP's scored, killing the enemies HQ and most expensive unit, I scored 24 points out of a possible 30, giving me a great flying start for the tournament!
Well, after another long battle report from me, let me know what you all think! Also, look out for Battle Report Two within the next few days.
Cheers guys!


.JPG)

4 comments:
Congrats on the victory! And people said old vs new couldn't be a success!
T'was a good game, taught me an important lesson about going for the win rather than the glory thats for sure. You played it well.
Glad to see you found the blog Walter, I hope you think the write up did you justice! It really was a very close game, and a load of fun.
Hopefully play you again sometime mate!
Yup very happy with it :)
Next time hopefully you can be telling people about how I beat you :p
Will keep an eye on your blog and give you a shout if we cross paths at another tourney, would be up for a wee rematch.
Post a Comment