Saturday 30 May 2009

WPS Club Challange: After Action Report (Part 3)

Hey guys, its time to continue my report of the Club Challange and move on to my second game of the weekend. 

Game 2 - Daemons (Andy)
Annihilation - Pitched Battle 

After finding my table for my second game I was reminded that we were playing an Annihilation game and briefly took hope. My list only gives out 9 kill points and contains some units that are pretty hard to kill, so normally Annihilation is my forte. 

That was until I realised I would be playing a pure Nurgle Daemon army, full of mutli-wound Monstrous Creatures and Feel No Pain units. This game would be tricky...

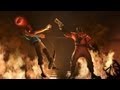
The above picture only shows some of Andy's awesomely converted and beautifully painted army. It was a real pleasure to look at, but a nightmare to fight! 

Andy's List 

Kugath

Epidemius

14 Plaguebearers with Icon

7 Plaguebearers with Icon

7 Plaguebearers

7 Plaguebearers

8 Nurgling Bases

Daemon Prince (Iron Hide, Noxious Touch, Flight, Mark of Nurgle, Daemonic Gaze, Cloud of Flies)

Daemon Prince (Iron Hide, Noxious Touch,  Mark of Nurgle, Daemonic Gaze, Cloud of Flies)

9 KP's

So, an extra hard list that not only contained 3 Monstrous Creatures (that I often struggle with) but was also capable of throwing out AP2 pie plates. To have any chance of getting to winning this game I realised I would really need to concentrate. 

This being the case, I managed to make mistakes from the beginning!

Now this was the first time I had actually played Daemons, and I was so concerned about how I would go about deploying that when I won the roll off for first turn, I stupidly took it without thinking! An ultimate mistake against Daemons, as you effectively loose a whole player turn to kill them. I was thus off to a great start!

Deployment

From the start I was worried about Kugath's ability to drop AP2 pie plates, so I deployed in a way that protected my greatest assets, the Terminators. I hugged the South Eastern corner of the board, ensuring that no Daemon would be able to deep strike behind me. The Tac Marines occupied a large building, looking to make good use of the cover. Unusually for me I placed my second Terminator Squad in the Land Raider, figuring that it would be better for them to use its extended charge range. Their multiple Power Fists would do better against the Monstrous Creatures  than Belail's squad that relied on Lightning Claws. I was hoping that the Ravenwing's mass melta would be able to take out enough of those MCs, so that the D'wing could deal with the rest of the horde.  


Turn 1

With no enemy on the board, I held fast in the first turn, waiting to see what would arrive from the Warp. 

In Andy's turn the skies darkened and the first wave of filth was borne forth. Getting the part of his force that he wanted, Andy deepstruck Kugath, the two Daemon Princes and Epidemius with the 14 'man' Plaguebearer unit, focused in roughly the middle of the board. In his shooting phase he was able to down 2 of the Ravenwing Bikers shielding Belial, and Ran Epidemius and his grizzly escorts into the cover of a nearby building.  

In the above picture, Kugath is the uppermost model, with the winged Daemon Prince next, and the walking Prince in the South. 

Conor: 0KP      Andy: 0KP


Turn 2

In my turn my forces rearranged themselves, well aware of the fact that half the Daemon army was yet to arrive. The Ravenwing Speeder, Attack Bike and the Crusader swung round to the north of my deployment, taking pot shots at Kugath but failing to hurt him. The bikers, reeling from their wounds, sought better cover whilst Belial's squad advanced cautiously, behind a screen provided by the Rhino. Bar this the Rhino popped smoke and the Tactical Squad's Lascannon managed to take a wound off Kugath. 

1 wound down, 5 more to go. Not to mention the two other MC's. This game was not looking good...

In his turn Andy was gifted with the arrival of a Pluage Bearer squad and the Nurglings, both of which deployed around his MC's, with the Nurglings scattering quite far forward. Continuing their advance, the MC's bore down on my forces, but still looked like they would need another turn to engage me in close combat. In the shooting phase Kugath again targeted the Rhino-shield but scattered badly. Meanwhile the Daemon Princes unleashed their Demonic Gaze at the bikers, but only managed to kill one more, due to their better cover.  

Conor: 0KP      Andy: 0KP


Turn 3

Determined to gain the initiative, I reasoned that I had to get Belial and his squad into the game, fast. I figured that in Andy's turn they were either going to be subject to Kugath's AP2 Blast o' Doom, or a charge from the Winged Prince...or both. 

I decided to help this process along by having Belial and co. charge the Nurglings directly in front them. Assuming they couldn't chew threw this 21 wound unit in one go, it would give Belial and his squad protection from shooting. I also hoped that this rash move would force Andy into making the obvious counter move, charging his Daemon Princes into the combat. If all went to plan they would be softened up by any of the squad that survived and then I could charge my Power Fist armed termi's from the Land Raider, hopefully dealing with them. That would still leave Kugath to deal with but, with his Slow and Purposeful rule, I hoped the Ravenwing could run rings around him. It was a fine theory. Now to see if it would work...

Retreating the Rhino to the rear ('Get that Kill Point out of there!'), I moved Belial and co. forward, towards their target. The Ravenwing forces continued to make good use of cover, hoping to soften up Kugath some more. Finally the Land Raider rumbled forward, ready to strike next turn. 

Shooting went okay, with the Ravenwing managing to take 2 more wounds off Kugath (only 3 left...), whilst the combined fire of the Tactical Squad and Crusader only managed to drop the winged Prince down by a wound. 

In the combat phase things went as well as I could have hoped for, as Belial and his squad cut a swath through the Nurglings for no loss. Once the dust settled (and fearless saves were made), one 1 Nurgling base with 1 wound remained. Perfect! I had images of Belial and his squad passing the Nurgling round to use as cover, much to the creatures delight!  

The Deathwing/Nurgling clash in progress

In his turn, Andy received the last of his reserves, in the form of two 7 'man' Plaguebearer squads, that Deepstruck as close to the central combat as possible. His advance continued, with both the Daemon Princes positioning themselves for the expected charge. Kugath suffered badly with his Slow and Purposeful rolls, probably slipping in his own slime, whislt Epidimus remained in cover with his attendant Plaguebearers, frustrated at how slowly the tally was coming along. 

Shooting was ineffective, with Kugath failing to hurt the Crusader, and both the Princes focusing their attention on the combat ahead. When the combat came, it again went as well I could have hoped. Firstly Belial, who was stuck fighting Nurglings, managed to dispatch the base, earning the first KP of the game. Then, despite having 10 combined attacks, hitting on 3's and inflicting power weapon wounds on 2+, the Daemon Princes only managed to kill 3 Terminators. In response the Standard Bearer and Apothecary inflicted a stunning 5 wounds, leaving both the Princes on a wound a piece! Glory for the Lion! 

Even Belial is somewhat taken aback at how well his men did...

Conor: 1KP      Andy: 0KP

Turn 4

Executing my plan, the Land Raider launched itself forward, ready to drop the second squad of Terminators into the central combat. Meanwhile the Ravenwing continued to drive north, and the Tactical Marines held firm, making good use of their cover. In the shooting phase the Ravenwing took one more wound from Kugath, while the Crusader and Tactical Squad managed to drop a few Plaguebearers from the southernmost squad. I quickly realised I was going to have to get my Kill Points in combat, as this was not an army I could gun down! 

In the combat phase my second Terminator Squad joint charged both a Daemon Prince and the southernmost squad of Plaguebearers, drawing more units into the melee. The combat itself was mixed, with both the Daemon Princes and a few Plaguebearers falling, but not before they killed off the rest of the Terminator Command Squad and a few of the new arrivals. 

In the Daemon turn Kugath again failed to make any headway with his Slow and Purposeful rolls. Becuase of this Andy seemed to get worried that the battle was starting to turn, and moved Epidimus and the large Plaugebearer squad out of their cover towards the combat. With difficult terrain and run rolls of 6, they made worryingly good progress! 

No doubt frustrated about all his fumbling, Kugath launched his shooting attack at the Ravenwing Bikers in cover and managed to kill 2, leaving one slime covered biker remaining. 

In combat Andy charged in a second 7 man Plaugebearer squad into the fight. This turned the tide in his favour - although Belial reduced the first Plaugebearer squad to 1 man, the reinforcements finished off the other Terminators before they could even strike. 

Conor: 3KP      Andy: 3KP

Turn 5

Starting this turn in the lead (just), I decided I would stick to my guns and try and kill Kugath before he made it to the central combat. I knew I was likely to lose Belial (and a Kill Point), but if he could finish off the now 1 man Plaguebearer unit in his combat, I should be home and dry. 

Moving the Ravening and Land Raider into better firing positions, disaster struck. Attempting to get himself out of cover, my last Ravenwing biker snagged himself on a rock and went crashing into the dirt, taking his kill point with him! Nooo! I had a grim feeling that this would come back to bite me in arse! 

To make matters worse, the Ravenwing failed to even hit Kugath (damned Multi-Meltas!) and Belial failed to kill one Plaguebearer with his 5 attacks!! Luckily he survived combat, but I was not impressed.

In his turn Andy continued to advance his forces with Kugath finally making it to within charge range. With no shooting Kugath launched straight in...and entered the most boring combat phase of the century, with neither side making any kills. Apparently both sides were just staring at each other or something... 


Conor: 3KP      Andy: 3KP

We rolled for the game length and got a turn 6. 

Turn 6

Turn 6 left me with very few options. I wouldn't be able to gun down any of Andy's remaining units with the fire power I had, and I had nothing more to throw into the central combat. I had to hope Belial could kill off his Plaguebearer opponent and survive the reprisals. In my shooting phase I poured some fire into the big Plaguebearer unit, but only dropped a few. 

Turning to the all important combat... yet again nothing happened! Belial failed to kill the Plaguebearers, and even Kugath failed to kill him in return. 


In his turn, Andy's only significant move was to charge the last 7 man Plaguebearer unit into the combat. Belial AGAIN failed to kill his mark, and the reinforcements were enough to finally bring the Master of the Deathwing down, pushing Andy into the lead for the first time. At this point the game came to an end, denying me the chance to try and kill the one man Plaguebearer unit with shooting. 

Conor: 3KP      Andy: 4KP

Daemons Victory 


Well this was a really close fought game, against another great opponent. Andy had a really well crafted army list and he used it excellently. I did my best to wear down his Nurgle units but they just proved too resilient for me, as they should!

In the end I did have my share of bad luck, what the Ravenwing biker being unable to navigate a bit of rubble and Belial seemingly forgetting how to use the pointy end of his Power Claws. That said, I'm not going to blame the dice for my loss, as the Terminators performed over the odds on their charge - so as usual karma balanced the game out. 

It being a narrow defeat (along with some bonus tournament points) I was able to take 19 points out of a possible 30 for that game, which was probably a fair reflection of how close it was! 

I hope you all enjoyed the battle report; look out for my final write up from the WPS soon, where I'll go over my last 3 games and tell you where I ended up! 

Friday 22 May 2009

WPS Club Challange: After Action Report (Part 2)

So then, time for a tournament report of the WPS! It turns out that I have enough pictures and notes to make fairly full reports of games 1 and 2, so I'm going to do these as separate posts, before rounding up games 3, 4 & 5. Putting it all together would create a mammoth post that would take an hour to read! 

I used my standard 1500pts Dark Angels list throughout the tourni (which can be found here). The rest of the armies were dominated by marines, with Chaos Marines being the most numerous. There were also a few Inquisition forces, and 1 Tau, 1 Daemon, 1 Eldar and Dark Eldar army. I would complain about the lack of variety, but then again I had brought marines myself... 

All the games we played were pre-determined and had a varying number of tourni points available dependant on how good/bad your victory/loss was. Extra tourni points (to a max of 30pts per game) could be scored for the following: 
1. More Victory Points scored than opponent 
2. Killing most expensive enemy HQ
3. Most expensive enemy unit/vehicle under half strength/destroyed 
4. 1 Undamaged vehicle or squad above half strength within 12'' of enemy board edge 

Game 1 - Space Marines (Dark Angels - Walter) 
Seize Ground (5 Objectives) - Dawn of War 

Having had to leave Bristol at 5am to get to Liverpool in time, I was already feeling tired as I arrived for the first game. Luckily my opponent, Walter, was an absolute gem of a guy who was also at his first tournament. Amusingly, he was also a Dark Angels player, however, he had the effrontery to be using the vanilla Marine Codex. Now, I couldn't blame the guy, but I figured I should attempt to show him the error of his ways!

His List
Captain - Relic Blade, Storm Bolter
Command Squad - Power Fist, Apoc. 
Razorback - Twin Lascannons 

Tac. Squad - Power Fist, Meltagun, Plasma Cannon
Rhino 

Tac. Squad - Power Fist, Meltagun, Plasma Cannon
Rhino 

Tac. Squad - Power Fist, Meltagun, Lascannon
Rhino 

6 Man Assault Squad - Flamer

Vindicator 

Whirlwind

Deployment

Winning the roll for first turn, I relinquished the initiative to Walter - hoping to have that last turn to grab objectives, and to see where his considerable firepower would be placed. Being DoW, deployment was limited. He placed down two tac squads, one on each side of the board to threaten objectives. 

I split my tac squad up and placed the Lascannon in cover behind a hill in the center of my deployment zone, a move and a run away from an objective. I then placed the Plasma Gun Combat Squad in cover on the eastern flank, near another objective. I knew that Walter could easily win the day by destroying my few troop choices, so I was keen to keep them hunkered down until nearer turn 5. 

Turn 1

Walter moved his mass of armour on the field, concentrating on the west side of the board, whilst the arrival of two tactical squads in the east more than outnumbered my one tactical squad guarding objectives. 


Fearful of the power of his Vindicator and Lascannon Razorback, my Land Raider (carrying Belial and the Terminator Command Squad) and Land Speeder snuck onto the board on the west flank, using a tower as cover. Given that both the D'wing and Ravenwing bikers were in reserve, I wanted to wait a least a turn before striking. 

Conor: 0 Objectives Walter: 0 Objectives

Turn 2

In his turn Walter continued to advance his armoured wall, and was frustrated to find he had little to shoot at. What shots he could aim at my tac. marines were deflected by either power armour or cover. 

In my turn, in an usually punctual display, all my reserves turned up. To add the icing on the cake, all the Ravenwing managed to outflank to the west, exactly where I needed them. Realising I had to pounce pretty much now or never, I was still concerned about the Vindicator and two Plasma Cannons making a mess of my troops - especially Belial's squad. In order to provide my advance round the building with some cover, I set the Ravenwing bikers against the assault marines. I knew they wouldn't beat the squad in combat, but it would keep the bikers safe from shooting and provide a LoS blocking combat. I was also confident that Belial would be able to charge in next turn to save them, and ready to carve through the rest of the enemy army. 

My second D'Wing squad tryed to deep strike behind cover, ready to move onto an objective in the central ruins, but scattered, right into the firing line of the Vindicator. Doh! I was forced to run them, hoping that I would be lucky when the templates came. 

After some ineffective shooting, the Ravenwing charged the Assault Marines, killing two for a loss of two themselves. Belial and his squad emerged from the Land Raider and charged to nearest Rhino, immobilising it, and using it as handy cover! 


Conor: 0 Objectives Walter: 0 Objectives

Turn 3

Walter was again frustrated by a less than perfect round of shooting. His Vindi scattered badly, only killing two terminators in the central squad, whilst the Plasma and Lascannon fire he poured into Belial's unit was completely blunted by those 4+ cover saves. However, despite this, his numbers were beginning to tell, as he took two objectives in his own deployment zone with separate Combat Squads. Meanwhile the two Rhinos (containing a Combat Squad each) on the west flank pushed towards the centre - bearing down on my Lascannon squad and the nearby 5th objective. He also dismounted another combat squad from the immobilised Rhino, but their shooting at Belial's squad was ineffective. In the combat phase the Terminator Command Squad wrecked the same Rhino.

It was clear at this point that I needed to quickly finish off with the western flank, in order to help my Combat Squads in the east that were about to be overwhelmed. To this end, the Terminator Command Squad advanced on the Assault Marine/Ravenwing Combat, whilst Belial detached himself, confident of his ability to deal with the nearest combat squad alone. Near the ruins, the second Terminator Squad advanced on the Razorback & Vindicator, supported by the Ravenwing and the Attack Bike. 

Shooting was mixed, the Attack Bike and Land Speeder managed to immobilise and stun the Vindicator, whilst the Crusader began to whittle down a Plasma Cannon Combat Squad in Walter's deployment zone. Annoyingly though, the Lascannon in my Combat Squad managed to miss the Rhino's bearing down on it. Combat was much more fruitful, with dual Terminator charges - always fun! The attack on Razorback left it immobilised and with no Lascannons, and the Termi Command Squad made short work of the Assault Squad. Belial, charging through cover, was able to kill all 5 marines in the combat squad, but was taken down by the dying Sergeants power fist. 


Conor: 0 Objectives Walter: 2 Objectives

Turn 4

With the west flank beginning to crumble, Walter pushed on in the center where he would easily be able to win on objectives. One Rhino peeled off, its squad disembarking in the ruins and claiming an objective, whilst the second bore on into my deployment zone, claiming the objective opposite my Lascannon team. In his shooting phase Walter was a bit limited by the fact that I had consolidated my Ravenwing to screen the Deathwing Command Squad, giving them a cover save against his Plasma Cannons. Failing to kill any Deathwing, he instead gunned down both the Land Speeder and two Ravenwing Bikers, leaving one left. In combat his Command Squad charged the Terminator Squad that had wrecked the Razorback, the Captain's Relic Blade easily taking care of the three remaining Deathwing. Ouch!  

In my turn, conscious that I really needed to start moving on objectives, my Deathwing ignored the temptation to charge the Command Squad, and instead advanced towards the Plasma Cannon Combat Squad. The plan was to cut them down this squad this turn, setting me up to advance on another Combat Squad holding an objective behind the hills. In the east, my Lascannon team moved around their cover, and made ready to try and shift the enemy off their objective. In my shooting phase the remaining Ravenwing shot into the approaching Command Squad to no effect, the Crusader failed to kill any of the Combat Squad holding the ruin and finally the Lascannon team managed to kill one of their opponents with pistols. The Attack Bike did manage to blow the Whirlwind sky high, which was a bonus!  

Combat again went well, the Terminators easily killing all of the 5 marines they faced, and the Lascannon team managing to kill two marines on their objective. Best of all the Sergeant with the Power Fist didn't manage to hit the lascannon team, though he held fast with the last member of his squad. 

Conor: 1 Objective Walter: 4 Objectives

Turn 5

With 4 of his 5 Combat Squads either holding or contesting objectives, Walter's movement was limited to his Command Squad chasing after my Terminators. With that Captain and his Relic Blade backed up by Veteran with a Power Fist, the squad was more than capable with dealing with my Terminators, who really were my only hope at this point. 

In his shooting phase the Command Squad attempted to down some of my Terminators to no avail, whilst a Combat Squad gunned down the attack bike. In combat his Power Fist armed Sergeant once again failed to hit my marines and watched while his last comrade was dragged under. The crucial Command Squad charge started well for Walter, with the Captain felling two Terminators. However, in return the Deathwing cut down most of his Command Squad and won the combat. Determined to safeguard his objectives however, the Captain and his remnants stood fast.

Movement in my turn was pretty limited. The Land Raider swung round (running over the wrecked Rhino) to continue firing on the Combat Squad in the ruins, and my one remaining Ravenwing biker turbo-boosted to that objective, hoping to deny it to the enemy should this be the last turn. 


After an uneventful shooting phase, the combat phase began. In the east my Lascannon team failed to down the remaining Sergeant, who again only managed to flail wildly with his Power Fist, leaving the objective contested. In the crucial combat with the Terminators, the Captain was only able to kill one Terminator (I made three 5+ saves against the Relic Blade!), and he was swiftly cut down - leaving only one Marine standing bravely in the Deathwing's path. Did I say bravely? I meant incredibly foolishly...


We rolled for the end of the game and the Emperor smiled on the true Dark Angel forces, granting me a turn 6. 

Conor: 1 Objective Walter: 2 Objectives

Turn 6

Again Walter was pretty much limited in what he could do. As the Terminator squad was in combat he was unable to fire on them with the nearby Combat Squad, but equally could not move away as he would loose that objective. He was able to destroy the last Ravenwing biker, and regained control of the ruin objective. Finally he moved a Rhino in the east to contest the one objective I actually held at that point.  

Combat saw him loose both this Power Fist Sergeant in the east (leaving me in control of that objective!) and the last of the Command Squad. At the end of Walters 6th turn he was 3-1 up - it would be down to the D'wing once again. 


My first move in my turn was charge my Land Raider forward, successfully negotiating difficult terrain, to contest the ruin objective. The Melta-Gun armed combat squad there would give me no end of pain if there was a turn 7, but Walter was so far ahead that I had to even the Balance. Annoyingly, both the Lascannon and the Plasma Gun of the Tactical Squad failed to blow up the Rhino contesting the objective furthest east. In combat, the remaining Deathwing advanced and did their job excellently, with the enraged Apothecary killing with all his attacks, wiping out the Combat Squad and taking the objective they were standing on. 

(In this picture, the Land Raider is actually on the terrain and contesting the objective, it was just impossible to actually place it there!)

Conor: 2 Objectives Walter: 1 Objective

With the balance temporarily switched in my favour, we rolled for the end of the game. The dice came up a 2, leading to:

Dark Angels Victory! 

... victory for my Dark Angels that is!

So, a really enjoyable game where I was able to pull a victory from the jaws of defeat. Walter was an excellent opponent who provided a good explanation for his defeat. He pointed out that he got greedy and attempted to go for all the objectives when the battle was going well. After he had spreaded out to do this, I was able to take his army down piece by piece. 

So, with points for a narrow victory, more VP's scored, killing the enemies HQ and most expensive unit, I scored 24 points out of a possible 30, giving me a great flying start for the tournament! 

Well, after another long battle report from me, let me know what you all think! Also, look out for Battle Report Two within the next few days. 

Cheers guys!

Monday 18 May 2009

WPS Club Challange: After Action Report (Part 1)


Well, as you can see, I did pretty out of the WPS Club Challenge! 

I can very proudly report that my lowly Interrogator Chaplain  manged to win the Single Model category of the open competition, in face of what I thought was some stiff opposition. Now its hardly a Golden Daemon, but its my first gaming award so I'll be damned if I'm not going to show it off! 

As for the weekend itself, I had an excellent time - it was a fabulous introduction into the tournament scene. All my games were great fun, against some of the nicest people you could hope to meet - I certainly did not meet any of the power gamers we all hear so much about. 

Now at this point I'm unsure how well I actually placed, as we had to leave before final results were announced. However, if my maths is right I think I may have ended up in the top 15, out of about 60 odd players - not bad for a first tournament! I also managed to take enough notes and pictures to make two full battle reports, and summaries of the other three. So, when the tournament scores are posted online, I'll write up a full tourni report for you all to chew through!

So, lacking any battle reports, I'm simply going to bombard you with some rubbish pictures from the event. And I have made a resolution to get a better camera! 

First off, just to show the scale of the event, here are some pictures of the 40k & Fantasy room. There were further rooms for Blood Bowl, Warhammer Ancient Battles, Hordes/Warmachine & Flames of War - it was quite an experience to see pretty much a whole hotel taken over by legions of hobbyists!


The pictures below show some of the quality that was entered into the Open Competition. For example, in the background of the first pic you can see one of the other single miniatures, complete with stained glass window! I wish I had taken some more photos other of the other entrants! 


Next up are a few shots of some the 40k armies that caught my eye over the course of the weekend: 

Red Scorpions 

Death Guard

Mantis Warriors

Chaos Marines

Chaos Marines

A special mention goes to the next army, as it both belongs to a fellow member of the Bristol Vanguard and was, in my opinion, easily the best 40k Army at the event. My camera-phone really doesn't do the army justice, so be sure to check better shots out here.


Finally, one of the more interesting aspects of the WPS for me was to see all the other games systems in action. As a gamer exclusively faithful to 40k and its sub-games, it was a real education to see some of the WFB, WAB & Flames of War games going on. 

The biggest shock for me is that I've come away with a real urge to play Flames of War. It looked to be a really fun system and, being a WWII buff, it really appeals. At this rate sovietspace might finally have a Soviet horde to call his own! If I can find someone else locally who will take the plunge with me, I am considering postponing my Imperial Guard plans and traveling back to 1942... Its heresy, but there it is! 

Warhammer Ancient Battles

Flames of War in action 

Anyway guys, I hope I've reflected the great time I had in this post. I simply can't wait to get to the Pompey Pillage! 

Look out for a full Tournament Battle Report in the next few weeks! 

Monday 11 May 2009

Those New Army Shakes...

Right then, I am now officially on the bandwagon. I've bought the Imperial Guard codex and I'm facing some real difficultly in putting it down; has anybody got a cure for this? I figured, to mark its release, I would show you all my IG collection, and post up an army list that I think I may tackle after my Dark Angels are done. 

So, first of all, I present to you The Glorious 24th Praetorian Regiment of Foot.  


I first started picking up IG when the Praetorians were released in 1996, when I was only 9! I think I must have watched Zulu a thousand times that year! After picking up a squad here and there I ended up with the force above, as well as a large amount of the early FW tanks and a sizable Cadian detachment. When I left the hobby in 2004, I sold almost all of my GW armies, but I really couldn't bring myself to sell the Praetorians. For me they exemplified the wackyiness and Gothic humour, that the 40k universe captures so well. When I came back to the game, the 24th was the army that I learned 5th ed with, before moving on to my Saim Hann.


Unfortunately the 24th are now effectively retired, except for the odd Apocalypse game, where that armour really comes in handy. The overall painting on the army is very basic, not a highlight to be found - indeed some models only have 3 or 4 colours! At some point I would love to redo the army; dumping all the tanks, buying some more Praetorians off eBay and producing an infantry heavy army. Possibly with the help of copious amounts of Army Painter! 

However, the army list I have been considering has is not designed for my beloved 24th...

Reading the IG Codex, the new unit that really captured my imagination was the Medusa.

An 'in your face' siege tank, its a brutal monster that symbolises the overwhelming force that the IG love so much. With Bastion-breacher Shells the beast is capable of throwing out a Str. 10 Ap.1 Blast shot up to 48''! If your facing hordes its 'norma'l round is a Str. 10 Ap.2 Ordnance Large Blast shot at 36''. All for a measly 140 points! That, to me, is an awesome deal.  
 
Before long I was thinking up army lists based on the Medusa, and came up with the concept of the 'Line Breaker' companies. Similar to the SM Vindicator formations of the same name, I imagined IG companies formed solely to meet the task of punching through enemy front lines, utilizing the fire power of the Medusa, backed up with the humble Leman Russ and infantry. After some scribbling, I came up with the following list:

HQ

Company Command Squad     155pts
Regimental Standard, Medic, Plasma Gun x2
Astroptah 


Troops

Infantry Platoon
Platoon Command Squad     140pts
Company Standard, Medic, Heavy Flamer 
Commissar: Power Fist

Infantry Squad 1     65pts
Plasma Gun
Infantry Squad 2     55pts
Grenade Launcher 
Infantry Squad 3     55pts
Grenade Launcher
Special Weapons Squad     50pts
3 Flamers
Heavy Weapons Squad     75pts
3 Autocannons

Veteran Squad     170pts
Sergeant Bastonne
Heavy Flamer, Plasma Gun, Grenade Launcher 


Fast Attack

Vendetta     130pts


Heavy Support

Leman Russ Squadron     300pts
2 Leman Russ Battle Tanks

Medusa     155pts
Bastion-Breachers, Enclosed Crew Compartment 

Medusa     155pts
Bastion-Breachers, Enclosed Crew Compartment 

Total - 1500pts

Notes
 - This army effectively relies on the Medusas and LRBT's having enough firepower to occupy and cripple the enemy. The Medusas will hunker down, in cover if possible, and from there can tackle anything from hordes to Land Raiders. Meanwhile, the LRBT will advance with most of the infantry and attract fire onto their Armour 14 fronts, allowing the Medusa's to live longer.

- The Command Squad is a low budget affair, designed to hang back and bolster any defence. In Capture & Control style games they would be joined by the Autocannon squad, combined with infantry squad 3, in order to control a home objective.

- The Special Weapons flamer squad is designed to be combined with the Platoon Command Squad that, with the Commissar's Power Fist, should provide a nice counter-charge unit. They would advance with Squads 1&2, behind the LRBTs, to take objectives. In annihilation games they can make one nice 32 man unit, that should be fun to chew through!  

- Finally the Vendetta & Veteran Squad are my ace in the hole. Fast, reliable and packing a load of firepower - the Vendetta can hunt tanks and Monstrous Creatures, whilst the Vets. would hopefully be able to clear an objective. 

Well, that's what I've been playing with in my mind. I would love to hear some opinions on the list, critical or otherwise.

This is not an army I would use the Praetorians for, as it simply doesn't fit their fluff. I'm working on a few ideas for what models to use - including Cadians with Red Berets and a 1945 British Airborne style cammo scheme. Go watch A Bridge Too Far to see what I mean! 

Anyway, I hope some of you enjoyed the post and pictures. Please do let me know what you think of the list, I would love some suggestions.  

Next time on The Astronomican - A report from the WPS Club Challenge! 

I really love tanks - can you tell?

LinkWithin

Blog Widget by LinkWithin