


Hello all, and welcome to my first post of 2009! It hopefully will be a good'un...
Vogen '09 Campaign - Battle Report 1
Dark Angels vs. Necrons - 1500pts
Annihilation - Dawn of War
The first game of the Vogen Campaign for my Dark Angels took place in the early stages (around turn 5/6) and was for control of Sniper's Alley in the Western End of the City.
My opponent was Tom, a long time 40k friend, though one new to playing Necrons.
Army Lists

(Click on Image for a Larger Version)
For this 1500pts game I took my standard all comers 1500pts List. It would be the lists first outing so I was very interested to see how it performed...
Annihilation would normally be a perfect mission for my Dark Angles as the list totals a very reasonable 9 Kill Points. However Tom's army also totaled 9 KP and had a large amount of Necrons, with their annoying 3+ saves and We Will Be Back Rolls. I was surprised not to see a Monolith. I had expected one, which I planed to ignore and go for the phase out. With those points instead rolled into a large number of warrior squads, getting a phase out would be tricky...
We rolled for mission and got Annihilation with Dawn of War Deployment*.
*We actually forgot to play the Gauntlet mission as we should have done in this territory.
Deployment


I won the roll of for deployment/turn and, keen to put Tom on the back foot, I chose to go first.
I decided to deploy my Tac Marine into a position of good cover in the central ruins, supported by my second Terminator Squad. I was unable to deploy my main strength (Belial & his squad) as I wanted them in their Land Raider which, as a Heavy Support choice, would be unable to deploy.
In response Tom deployed two Warrior squads and the Necron Lord to the field, in buildings on the far top left corner of the board. Evidently he was wary of my Terminators!

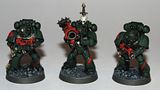
Tactical Marine's deploy in the central buildings, supported by the Deathwing.
Turn 1

In my first turn I moved on all my forces onto the board directly opposite to Tom's Warriors & Lord. I considered outflanking my Ravenwing but I
 decided it was better to deploy in strength and use the board edge to limit Tom's ability to gang up on me. He had the numbers after all.
 In the course of this movement my Land Raider, containing Belial and his squad mounted a hill and managed to immobilise itself (we had decided the hills would be played as difficult terrain) - this was a less than flying start! It would appear the Belial and his men would be walking from this point...
My Tac. Marines and Deathwing advanced to the center of the field, attempting to get a better view of the Necron Warriors on the left. However, they were unable to draw line of sight to their opponents in the shooting phase, and all other Dark Angles shooting was ineffective. The Deathwing in the center ran, in order to reach cover.
In the Necron turn Tom brought his all forces to the field, forming a long screen of metal along his board edge. Seeing that many Necrons all laid out, I realised I would be in for a challenge!

Due to movement Tom had little fire on his first turn, with the Heavy Destroyers notably failing to leave a mark. I his assault phase Tom charged my Termis with his Scrab Swarm, killing 1. In response the Deathwing managed to deal a measly two wounds to a base. * At this point I should mention that we had something of a rules fail. We both thought that power fists should cause extra wounds to scarab swarms but after checking the Swarms rule in the rulebook we could find no mention of it. We didn't think to check the Necron Codex (which states that weapons that doubles a base's toughness will kill it) - but with my long gap in gaming and Tom's inexperience with the codex an honest mistake was made. One that would cost me!
Dark Angels: 0KPs Necrons: 0KPs
Turn 2

In my second turn Belial and his squad bailed from the immobilised Land Raider and made for the Necron lines as fast as possible. My plan was to concentrate fire on one portion of the Necron force at a time, starting with the left and working my way along. I had to isolate his forces as best I could. To this end the Ravenwing bikers and Land Speeder moved up with Belial, using the central buildings to shield them from the bulk of the Necron army.

In the shooting phase the Tac. marines poured fire into the advancing Warriors, felling 4. The Ravenwing and Land Raider killed a similar number from the Warrior squad hunkered down in the building. However, frustratingly, Tom would proceed to make ALL his We Will Be Back Rolls at the start of his turn. The only real achievement was the Attack Bike destroying a Heavy Destroyer at maximum range (and earning a kill point). Belial and his squad also got 6 on their run roll, setting them up for a charge next turn.

In his turn Tom started to advance his phalanxes of Necrons, moving toward the left - and the bulk of my forces. The two central Warrior squads & the Pariahs poured fire into my woefully exposed Tac. Marines and killed 7 of them, including the Lascannon and Plasma gunner. In the face of this onslaught, the remaining three marines broke and withdrew from the building.
The remainder of Tom's shooting was directed at Belial's Terminators, who proceeded to weather everything thrown at them, a trend that was set to continue!
In the combat phases of both player turns the Scarabs and Deathwing continued to trade blows, with the little buggers managing to fell two more of the Emperor's finest!
Dark Angels: 1KPs Necrons: 0KPs
Turn 3
 It was evident by the 3rd turn that I was going to have to start inflicting some major casualties soon. Those large warrior squads were still intact, and were proving difficult to scratch, much less wipe out. Damn WWBB! Although I was up on KP's, the Tac. Marines and Deathwing in the center were effectively out of the game, which seriously limited my offensive capabilities.
I started by withdrawing the Tac. Marines and their Rhino. Forming 2 exceptionally vulnerable KP's between them I figured it was better to get them far out of the fight. The Ravenwing were using their cover to good effect (or so I thought) so they stayed put and continued to pour fire into the Warriors on the left, supported by the Land Raider.

It was Belial and his squad who gave me real hope of starting to make a dent in the Necrons. After shooting their Heavy Flamer his squad tore through the nearest Necron warrior squad and easily slew them all for no loss, despite the fact that they were charging into cover.
However, my victory was a bitter one. The presence of the Necron Lord's Resurrection Orb meant that the Warriors would be able to take WWBB tests next turn, despite my power weapons, denying me a kill point. The Necron Lord swiftly became my new primary target!

In his turn Tom's weight of numbers really started to show. After making a number of successful

The shooting phase went much as expected, the Ravenwing bikers being wiped out by a torrent of Gauss fire. To add insult to injury the Last Heavy Destroyer managed to stun my Land Speeder, leaving it staring at massed warriors, unable to escape.
In the combat phase the scarabs took down another Terminator, leaving one left to face the swarm.
Dark Angels: 1KPs Necrons: 1KPs
Turn 4

Moving into the 4th turn I realised that I had very little options left to me. Belial and his Deathwing were only real effective unit remaining, so they had to start racking up the kill points. To that end I moved them round the back of the top left building, to charge the Necrons behind it. The Rhino containing the remains of the Tac. Squad moved to the rear and greater safety.

Moving into the 4th turn I realised that I had very little options left to me. Belial and his Deathwing were only real effective unit remaining, so they had to start racking up the kill points. To that end I moved them round the back of the top left building, to charge the Necrons behind it. The Rhino containing the remains of the Tac. Squad moved to the rear and greater safety.

After loosing off a few shots into the gathered Necrons Belial & his Terminators crashed into the Necrons, managing to perform a split charge on both a Necron Warrior squad (containing the Lord) & the last Heavy Destroyer. Packing a sickening 16 Lightning Claw attacks, 4 Power Weapon attacks & 8 Power Fist attacks on the charge, the result was never really in doubt - the Deathwing killed all 10 Warriors and the Destroyer for no loss.
The real icing on the cake was the fact that I was unable to kill the Necron Lord (he was at the back of the Warrior unit and I couldn't target him). If he had died in combat he, and all the other Necrons around him, would have had a chance of making thier WWBB rolls with the Resurrection Orb. As it was the unwounded Lord had to attempt a Leadership test with a -11 modifier. Unsurprisingly he failed his test and fled off the table, taking the Res. Orb with him and rewarding me with a clean 3KP from one combat!
My victory was tempered by the fact that the rule-breaking scarabs finished off the other Deathwing Squad, leaving them free to bear down on my remaining units.
Shocked by the loss of the Lord Tom was able to do little else other than move his forces away from the Terminators and toward the remains of the Ravenwing. The scarabs also tore down the flank towards my Rhino. In the shooting phase the massed Gauss completely destroyed my stunned Land Speeder, and destroyed the Assault Cannon and Multi-Melta on the Crusader.
Dark Angels: 4KPs Necrons: 3KPs
Turn 5

Realising it was now down to Belial put me in the clear, I moved him and his squad round the building to begin chasing the Necron warriors. My only other movement was to further retreat the Rhino, putting as much space between it and the Scarabs as possible.
Again after a brief shooting phase Belial and his squad managed to reach the rearmost Warrior squad and caused 9 casualties for no loss. The reaming Necron fled toward his table edge. I was concerned that this victory put me rather close to the ten man Paraiah squad, but it this stage I had to ramp up those KPs and trust in my Terminators.

In his turn, in what I considered a surprise move, Tom moved his scarabs toward my Land Raider, as opposed to moving to take the Rhino and Tac. Marines. In his shooting phase Tom split his fire between the Land Raider and the Terminators. Though he caused no casualties to the Terminators he destroyed the remaining weapons on the Land Raider which (combined with the fact it was immobilised) earned him a kill point. To add to my annoyance the Necron all on his own rolled only fled a further 2 inches, narrowly staying on the board and denying me a kill point, opening up the possibility of a draw!
Dice was rolled, and the game (thankfully) continued.
Dark Angels: 4KPs Necrons: 4KPs
Turn 6

In turn 6 the main event was the complete destruction of the Pariahs by the Deathwing. After suffering 6 wounds from Power Claws/Power Weapons the Pariahs failed to hit with any of their return attacks and were easily finished by the remaining Power Fists.
At the start of Tom's turn the fleeing Necron Warrior finally left the table, leaving him two kill points behing. Tom used his turn to try and kill the Attack Bike but, just to rub salt in his wounds, it survived the shooting of two Necron Warrior squads and a scarab charge.
Rolling at the end of the turn we got a 1, and the game ended with the following result:
Dark Angels: 6KPs Necrons: 4KPs
Dark Angels Victory!
After a hard fought battle the Dark Angels stood victorious and took the North End of Sniper's Alley. Although I was unable to try out the bike's teleport homers in this battle I did confirm the fact that Belial and his squad is indeed a force to be reckoned with. They alone earned me all but one of my kill points. It also makes me wonder havoc the second squad would have caused if we had followed the rules properly and they had finished off the Scarabs...
Look out for my next battle report coming soon, which pits my Dark Angels against the forces of the Great Devourer.
I hope you all enjoyed the Battle Report, please let me know what you think!


.JPG)

7 comments:
Very nice report.
I really enjoyed reading it. thanks!
What a great way of combining photos and maps! Thanks for the effort and here's to more of the same, eh?!
- Drax
Great battle report mate, a great read for sure and congrats on the win
Let loose the angels of death. Belial is a devestator. Great report. I feel you on the scarabs. WE always mess up when i fight them too.
Forgive the question if you already answered it, but are the maps made using Vassal? If so, I'm totally going to have to borrow that method.
Also, is there an update on the campaign to come? The batrep makes me even more curious as to how it's going. :)
Thanks for the comments everybody. This write up was a lot of effort (it is perhaps a bit long), so it's nice to have that rewarded.
Malcom Wilson: Yes, the maps are made on Vassal, along with some photoshop love to create some the scenery and add arrows. Its a really good way of doing it mate.
We managed to get two more games in on the campaign before everybody went their separate ways. This means there will be one more mini-update and hopefully two more battle reports. Then, I'm afraid you'll have to wait till Easter!
fun read. thanks!
I was concerned in the beginning, but the surviability of the Deathwing is incredible.
Post a Comment